Call Us

We are ready to help

Request a special version

Didn't find what you were looking for?
This field cannot be empty.
This field must be at least 3 characters long.

Files

Drag & Drop files here or click to browse

File format supported: (.pdf, .zip, .docx, .png, .jpg .xlsx, .xls, .csv, .txt) & Max Filesize: 25mb

Need to be uploaded up 1 to 3 files.
File format supported: (.pdf, .zip, .docx, .png, .jpg .xlsx, .xls, .csv, .txt) & Max Filesize: 25mb
Leave your details so we can contact you
This field cannot be empty.
This field must be at least 3 characters long.
This field cannot be empty.
Please enter a valid email address.
This field cannot be empty.
Please enter a valid phone number.
This field cannot be empty.
Server error. Try again later.
Thank you!
We will send you a confirmation email and will contact you soon.
Don't have account yet? Register
Back to shopping

NPort W2150A WIFI

The NPort W2150A is configured via LAN.

The following steps are required for configuration:

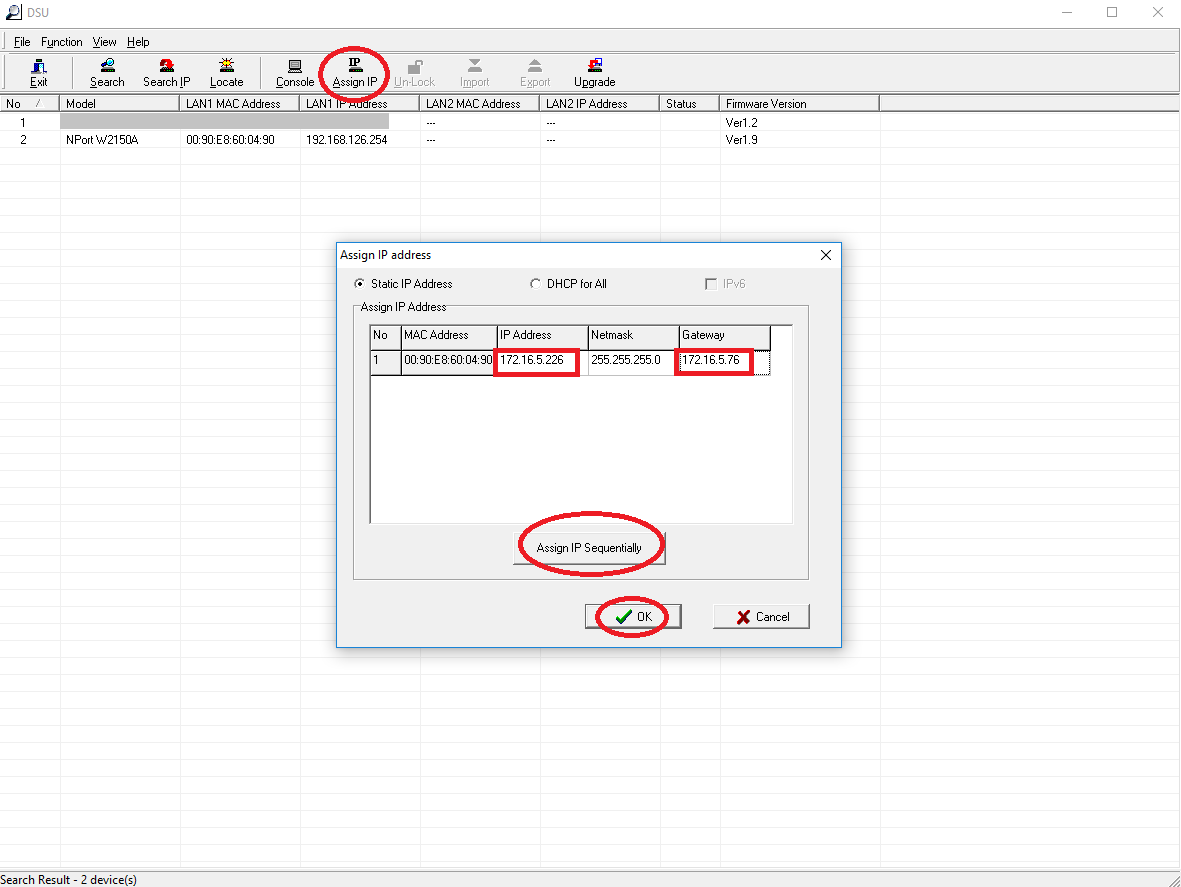
Discover the device on the LAN using the DSU software.

  • Assign the desired LAN address using the DSU software
  • Install a virtual COM port using the Nport/Oncell Driver Manager
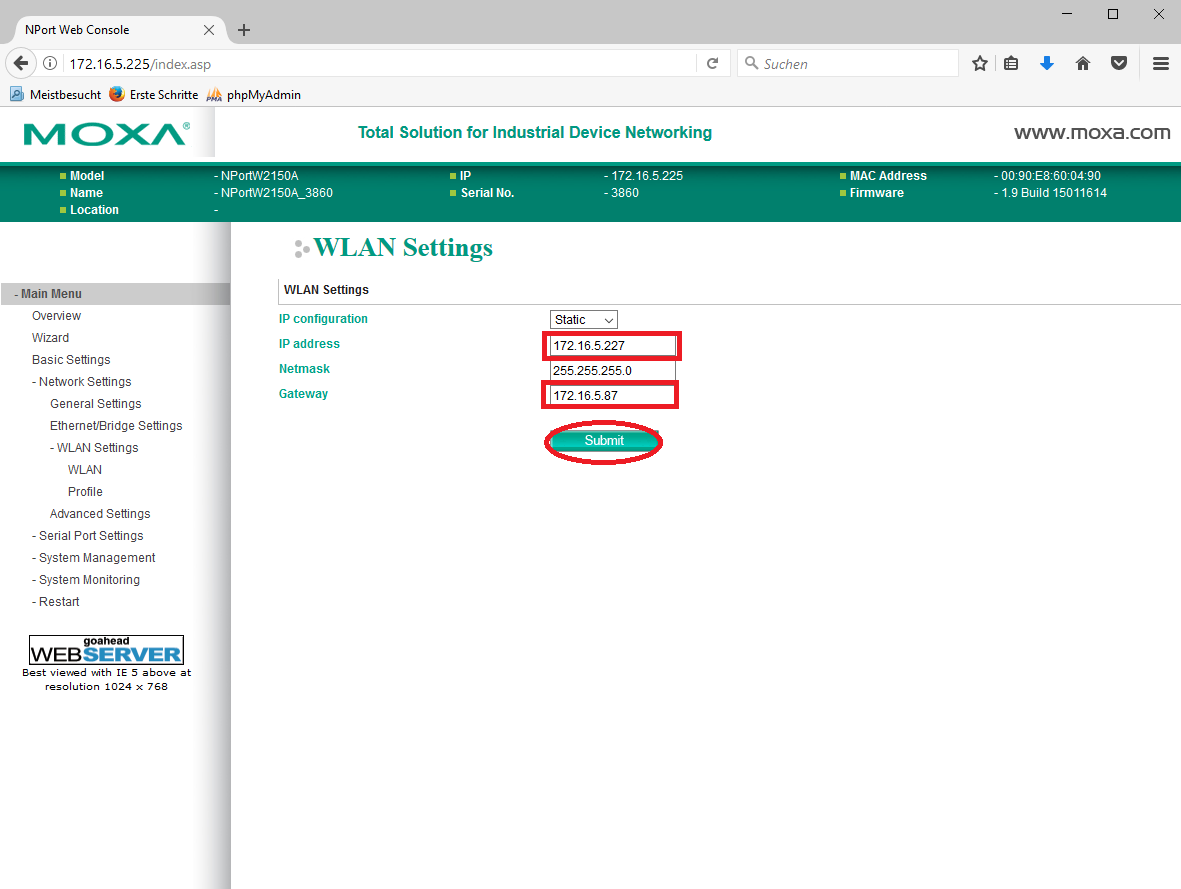
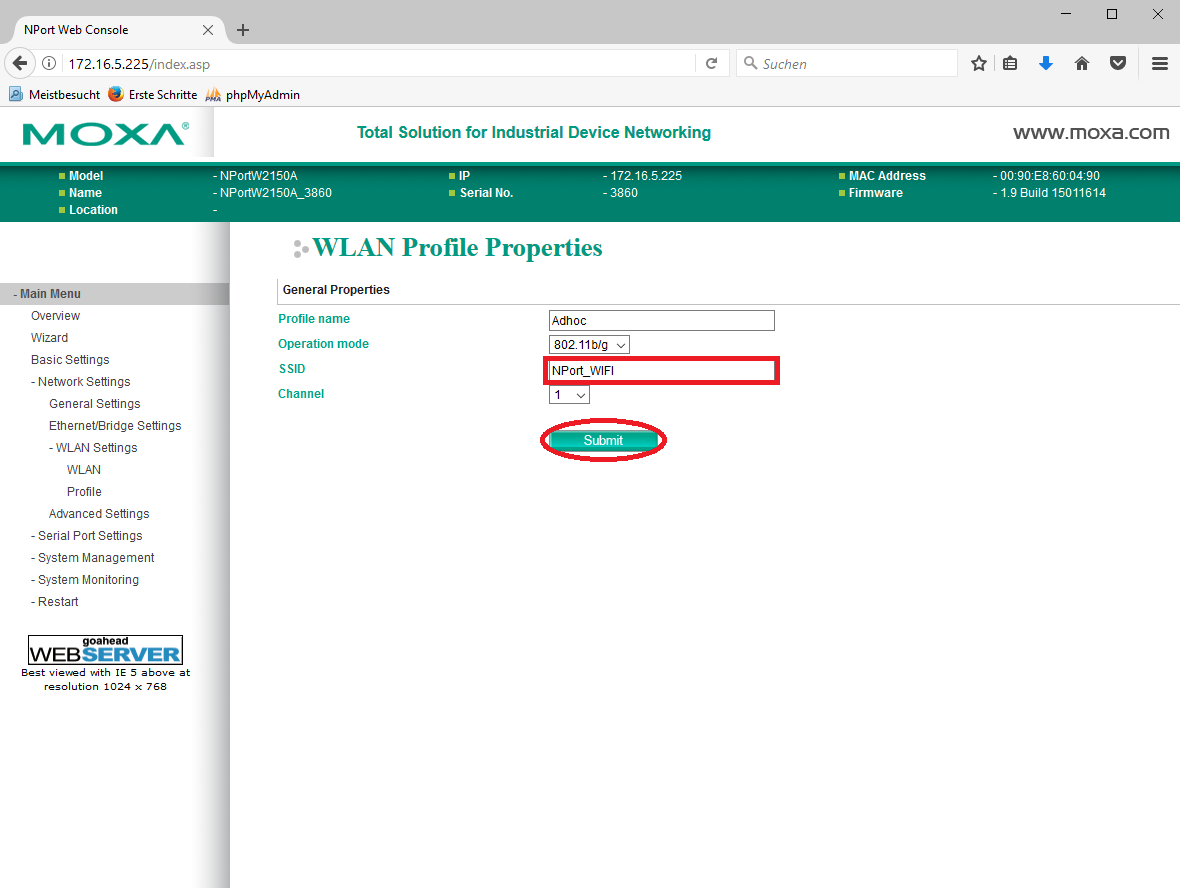
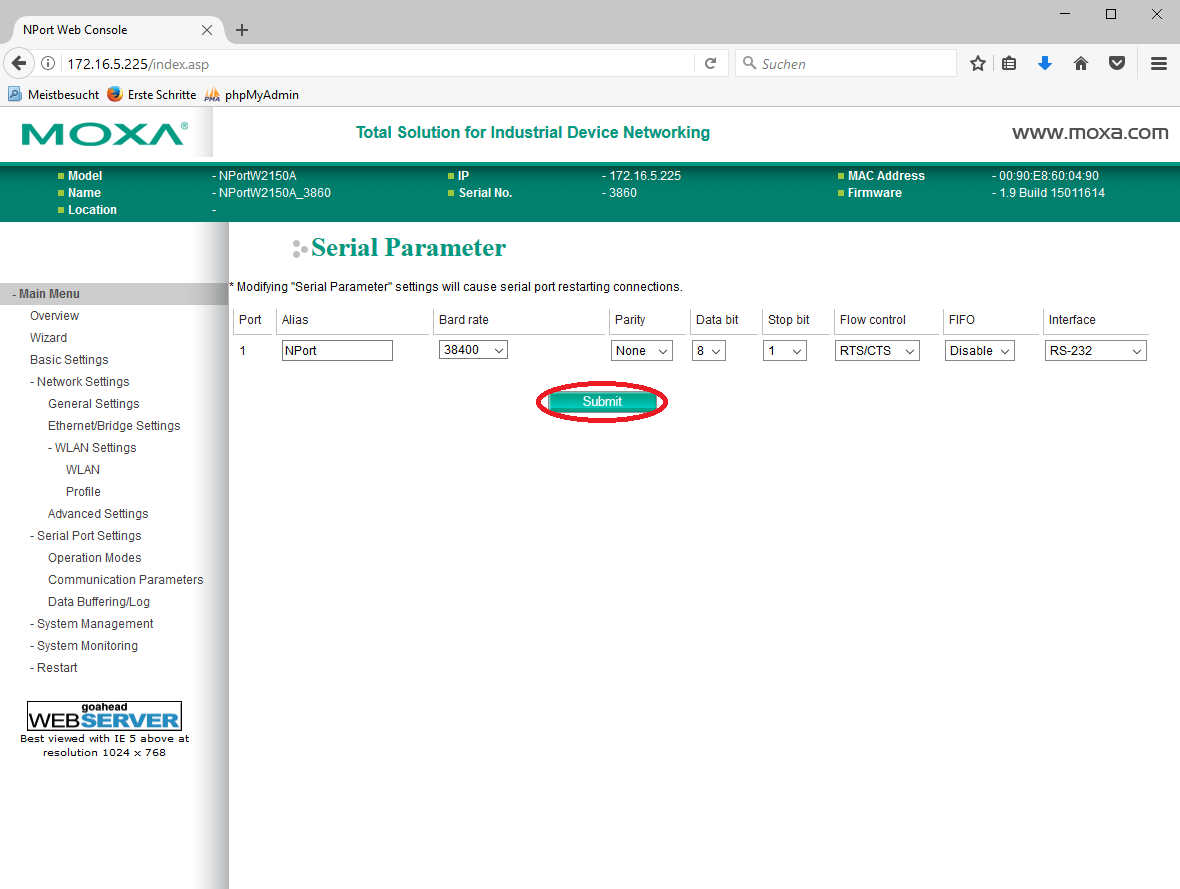
  • Configure the serial interface and WLAN properties via a web browser
  • Restart the device

DSU

The "DSU" can be found at:

https://www.moxa.com/support/sarch_result.aspx?type=soft&prod_id=849&type_id=5

Install and start this program.

Click the "Search" button to locate the NPort W2150A. Once it has been found and added to the list, select the NPort W2150A entry and click "Assign IP." Now change the IP address and gateway. Then click "Assign IP Sequentially" and confirm twice with "OK." The NPort W2150A will now restart and automatically search for the device.

The device server can now be accessed using a web browser at this IP address to make further configurations.

NPort/OnCell Windows Driver Manager

The "NPort/OnCell Windows Driver Manager" can be found at:

https://www.moxa.com/support/sarch_result.aspx?type=soft&prod_id=849&type_id=9

Install and launch this program.

First, use the NPort Windows Driver Manager to create the COM port for the NPort W2150A. To do this, click the "Add" button and then the "Search" button.

In the next step, select the NPort W2150A and confirm with "OK." Then, click the "Yes" button to enable the COM port. The program can now be closed.


Ethernet/Bridge Settings

Click "Login."

First, go to "Ethernet/Bridge Settings" under "Network Settings." For the IP configuration, select DHCP, for example, or select a fixed IP address with the associated network mask and gateway. Then confirm by clicking "Submit." The NPort W2150A will now reboot. After the beep, click "Search" in the DSU and double-click the list entry again.

WLAN Settings - WLAN

Now, under "Network Settings - WLAN Settings - WLAN," enter the IP address and the corresponding gateway for the NPort W2150A's WLAN. Then confirm by clicking "Submit."

WLAN Settings - Profile

Now go to the menu item "WLAN Settings – Profile." Change the entry for "Network type" to "Ad-hoc Mode." Then confirm again by clicking "Submit."

WLAN Settings - Profile - General

Now, in the "WLAN Settings – Profile" menu, click on "General." Enter a name for the Wi-Fi network under SSID. Confirm by clicking "Submit."

Communication Parameters

Now, in the "Serial Port Settings – Profile" menu group, go to "Communication Parameters." Set the appropriate parameters here. Confirm again by clicking "Submit."

Next, go to the "Restart - Restart System" menu item and confirm by clicking "Submit." The device will now restart. The configuration is now complete. Disconnect the NPort W2150A from the power supply, unplug the LAN cable, and turn the NPort W2150A back on.

GSVmulti

You can now connect to the NPort W2150A's Wi-Fi on your target device. Install the "NPort/OnCell Windows Driver Manager" and follow the steps to create a COM port as described at the beginning.

Now start GSVmulti and select the correct interface (the assigned COM port) and the corresponding baud rate.

bars-filter